Showing posts with label more cookies. Show all posts

Biscoff Cut-out Cookies

Remember Biscoffs?  Those little "airline cookies?"  We talked about them here.
Well, I wondered if maybe, just maybe, I could use the Biscoff Spread and make some cut-out cookies for decorating.

The answer?  Yes.

If you love those crunchy little Biscoff cookies, but would love a softer, more sugar-cookie-ish version, you might want to try this. 

{And, you don't even have to decorate them....just eat them plain.  Or, one other option that I'll show you in a minute.}

Biscoff Cut-out Cookies

2 tsp. baking powder
1/4 tsp. kosher salt
3 c. unbleached, all-purpose flour
1 stick salted butter, cut into chunks
1/2 c. Biscoff Spread
1/2 c. sugar
1/2 c. light brown sugar
1 egg
1/4 c. heavy cream

In a medium bowl, whisk together the baking powder, salt and flour.  Set aside.

In a large bowl of a stand mixer, beat together the butter, Biscoff Spread, and sugars using a paddle attachment until light and fluffy.
Mmm....fluffy.

Add the egg and beat well.  Beat in the cream.

In three additions, beat in the flour on low until combined. Divide the dough in half, shape into discs, wrap in plastic wrap and refrigerate at least 30 minutes before rolling.

Preheat oven to 350.  Line cookie sheets with parchment paper.

On a floured surface, roll the dough with a floured rolling pin to about 1/4th inch thick.  Place shapes on the prepared cookie sheet and chill in the freezer 5-10 minutes.

Remove from freezer and bake 8-12 minutes, depending on cookie size.  Cool on sheet 2 minutes, then remove to cooling rack to cool completely.

Decorate, eat plain, OR...
...sandwich together with a little Biscoff Spread.  Go ahead, try it!

Lady, er, LADIES' Fingers


Halloween is in one week.


In honor of that fact, I give you the finger.

Well, fingerS.  Creepy lady fingers.

I've had these on my to-make list for a few years now.  They come from Martha....the Queen of Halloween.  I think I could happily spend a year making projects from Martha's Halloween issues and books.


I adapted the original recipe and technique just a bit based on the comments from Martha's website.  While the fingers did "fluff up" a bit, I still think you can tell they are fingers.  The original recipe is here.

Ladies' Fingers

red gel paste food coloring
30+ blanched, slivered (but not chopped) almonds
2 eggs
1/4 tsp pure vanilla
1/2 cup salted butter (1 stick), cold
1/2 cup confectioners' sugar
3 TBSP granulated sugar
pinch of coarse salt
1 & 2/3 cups all-purpose flour
 
Place the almonds in a single layer on a cookie sheet. Mix together a couple of drops of food coloring with a couple of drops of water.  Using a small paintbrush, color one side of each almond. Set aside to dry.


"Painting" the fingernails is a great project for kids.


Use a toothpick to hold the almond in place or it will scoot across the cookie sheet.


{Please excuse all of the pictures of kiddo...I can't help myself.  I love pictures of those hands working.  Trust me...there are 14 more on my computer that you aren't seeing here.} 

Separate 1 egg. Place the white in one bowl and set aside.

In another small bowl, whisk together yolk, remaining egg, and vanilla. Set aside.

Cut the butter into chunks and combine with confectioners' sugar, granulated sugar, and salt. Beat on medium speed until well combined.

Add egg yolk mixture, and beat until smooth, about 2 minutes. Add the flour in two additions;  mix on low speed just until incorporated. Wrap the dough in plastic, and chill until firm, 20 to 30 minutes.

Preheat oven to 350.  Line two cookie sheets with parchment.

Divide the dough in half. Work with one piece at a time, keeping remaining dough covered with plastic wrap and chilled. Divide the first half into 15 pieces. On a lightly floured surface, roll each piece back and forth into finger shapes, 3 to 4 inches long. Pinch dough in two places to form knuckles. Score each knuckle lightly with a small knife.

Place the cookies on the cookie sheet and place in the freezer for 5-10 minutes.


Lightly beat the egg white with a fork.  Remove the cookies from the freezer and immediately brush lightly with egg white. Position almond nails; gently push into dough to attach.


Bake until lightly browned, about 10-12 minutes.  Remove to wire racks to cool completely.

Repeat with the remaining dough.


Creepy Lady Fingers...MWAHAHAHAHA! <---that's my best sinister online laugh.


Rolled Cocoa Cookies . . . from Teresa of Blooming on Bainbridge

You know how you can read someone's blog and exchange emails and all of a sudden, you feel like the person is one of your very best friends?  That's how I feel about Teresa.  I've never seen her sweet face in person, but we are going to rectify that SOON!

Teresa blogs over at Blooming on Bainbridge.  She's an Alabama girl now living in the Northwest.  If I had one word to describe Teresa's blog, it would be JOYFUL!  It doesn't matter if she's blogging about cookies or soup or yoga or her precious doggie, Doogan....each and every post is filled with joy.  This is one of my favorites.

Alrighty...without further ado, welcome Teresa!!!  I'm so happy she is here!


Hi! I'm Teresa from Blooming on Bainbridge! I live on an island. Delighted to meet you!
Sugar cookies piled high with icing and sprinkles have always been a LOVE in my life.
Several years ago...before I began blogging...I happened upon Bake at 350.
I honestly couldn't believe there was a blog that was whole~heartedly devoted to the love of 
iced sugar cookies!
I can remember the very first time I emailed Bridget about a problem I was having while icing sugar cookies for a BAMA football game. She emailed me back...
coaching me through the process of achieving the perfect shade of RED icing!
I've totally been hooked on Bridget and Bake at 350 since that day!
Well I've been more than just "hooked" on Bake at 350.
I've grown to love and adore Bridget as if she were a bestie that lived next door. 
Bridget is without a doubt one of the loveliest~sweetest~funniest~inspiring girls I know.
I am honored to call her friend. 
I am BEAMING so BRIGHT that she is creating a cookbook.
And I am thrilled to be sharing one of my favorite CHOCOLATE cookie recipes with YOU!
Rolled COCOA Cookies!
These are without a doubt one of the yummiest~easiest cookies you will ever ever make.
Trust me!
I wouldn't bake anything but THE BEST for Bridget...would you? ;)
Here's what you need to bake these cookies.
3 cups all~purpose flour {I use unbleached}
1 cup unsweetened cocoa powder
1 tablespoon baking powder
1/2 teaspoon salt
2 cups sugar
1 cup shortening
2 eggs
1/4 cup milk
1 recipe Cocoa~Butter Frosting
{I suggest doubling the frosting recipe. Trust me...you'll want lots of frosting!}
~recipe adapted from The Ultimate Cookie Book~
If you're baking for Bridget....you may wanna shine up the kitchen aid!
Make sure it knows who it's baking for. ;)
You'll also wanna tie on your favorite apron.
If you're baking for Bridget...you've gotta look CUTE!
Let's begin with the cookies.
Stir together the dry ingredients.
Set them aside.
In a large mixing bowl beat the sugar~shortening~eggs~and milk.
Beat on medium to high speed until combined.
Gradually add the flour~cocoa mix.
Beat in as much of the flour~cocoa as you can with the mixer.
Stir the rest in by hand.
When the cookie dough is ready...divide it in half. Cover and chill the dough for 2 hours.
One thing you need to remember if you're baking for Bridget!
Bridget LOVES good music!
So ROCK~OUT as you bake! Crank up some oldies ROCK!
If by chance the Eagles begin playing Hotel California....
don't resist the urge to LIGHT~UP a candle!
Pretend you and Bridget are at an Eagles concert ROCKIN' out!
It's all in the name of BAKING! ;)
After the concert the dough should be chilled.
Now comes the fun part.
Roll out the dough one half at a time. You will love the way this cookie dough rolls.
Use a 2 - 3 inch cookie cutter to cut shapes from dough.
Place the cookies on a cookie sheet lined with parchment paper.
Preheat oven to 375 degrees.
Bake the cookies about 7 minutes. The cookies will be soft to the touch when you take them 
out of the oven. Let them cool on a wire cooling rack.
Mean while...whip up the Cocoa~Butter Frosting.
2 3/4 cup powdered sugar
2 tablespoons cocoa
1/4 cup softened butter
3 tablespoons heavy whipping cream
1 teaspoon vanilla
Don't forget to DOUBLE this recipe if you want plenty of frosting.
Begin with the butter. Beat the butter til fluffy.
If you're baking for Bridget...make sure you SIFT the powdered sugar!
Sift the cocoa in with the powdered sugar.
Don't ever let Bridget know if you don't SIFT the powdered sugar. ;)
Gradually add 1 1/2 cups of the powdered sugar and the cocoa to the butter.
Beat in heavy whipping cream and vanilla.
Gradually beat in 1 1/4 cups remainder powdered sugar.
This is what you get.
The best~most yummiest COCOA frosting ever!
Make sure the cookies are completely cool. 
Get busy frosting. 
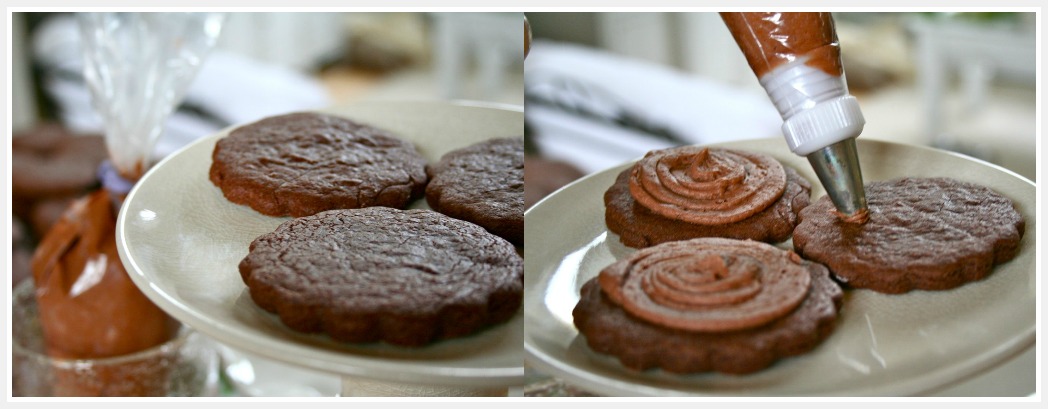
You can spread the frosting on if you like. It goes a bit quicker for me if I pipe it on.
I used a #12 tip to frost these cookies.
Then I sprinkled them with a little LOVE...just for Bridget.
Rolled COCOA Cookies!
You're going to LOVE these for the holidays!
Blowing Bridget and the readers of Bake at 350 oooooodles and ooooooodles of SWEET~KISSES
from Bainbridge Island.
I wish you all the loveliest of days!
Happy Baking!
xo
P.S.
If you look like a crazy girl after pouring your heart out in the kitchen for BRIDGET...
no worries!
It's all in the name of BAKING...with lots of LOVE!
~xxooxx~

The *Best* Back-to-School Cookies

 
Don't turn me in to the Parenting Police.  I know I should be giving kiddo apple slices (organic), cheese (but not too much), and crackers (whole-grain) for an after-school snack, but I give him cookies instead.

Before school started this week, I asked him what kind of cookies he wanted...for snacks and for his lunchbox.  He said "Peanut Butter Chocolate Chip" and my heart did a little leap!  I knew exactly which cookies I would make...
 
Jessica's Puffy Peanut Butter Cookies with Chocolate Chips
{You know Jessica from How Sweet It Is, right?  Right??!?  Oh, if you don't, are you EVER in for a treat.  Pop over, go ahead, just come back in a few hours.}


So, the recipe starts with meting butter and peanut butter together.  I mean, how can it NOT be good?!?


You mix it all up and add chocolate chips.


Then you eat as much as the raw dough as you can without making yourself sick.


I mean, you scoop it onto a cookie sheet.  Yeah, that's it.

And then, you pack a few extra in your kid's lunchbox so he can share.   And, you are a bad mom and give him a few more as an after-school snack.  And, you hope those cookies convince him to tell you about every second and every detail of school....because you want to know EVERYTHING.  (Or is that just me?)

Anyway...these cookies?  You need them.  They are quite possibly the best first-week-of-school cookies EVER.  Promise. 

Thank you, Jessica!  (The recipe? It's right here.)


Gingerbread for Summer !

 
We love our gingerbread cookies around here.  Poor, neglected gingerbread....it only gets trotted out in December, but it's so, so good.

How about a summery spin on gingerbread?  It's completely EASY and you won't have to wait for December for your gingerbread fix.

Lemon Cream Gingerbread Cookies

You Will Need:

 
Make the cookies and let cool.


Mix up some royal icing, flavor with 1/4 teaspoon pure lemon extract and tint with AmeriColor Bright White (if desired).

Top half of the cookies with royal icing. Add yellow sprinkles if you have 'em.

{Or do like I did and spend 30 minutes picking through jars of multi-colored sprinkles for the yellows. THAT would be a good project for your kids when you hear the dreaded "I'm Bored" this summer.}

 
Stir together 1/2 cup lemon curd (jarred or homemade) with 1/3 cup marshmallow creme.  Adjust the amounts based on how lemon-y you like it.


Then...

Plop some filling on the plain cookies and sandwich together.


Don't want to make the filling?  Skip it!  Top the cookies with a squiggle of lemon royal icing and a bit of yellow sanding sugar.  Voila! Gingerbread cookies for summer!


Do you love gingerbread?