Are you finished with your Christmas baking? Are you like me and smack dab in the middle, with a kitchen covered in a layer of flour, which should be cleaned, but the lure of the computer and blogging is just too strong? *sigh*
Tomorrow I'll share with you MORE Christmas ornament cookies...some that were (unbeknownst to me) actually used in a marriage proposal (!), but today, let's make personalized ornaments.
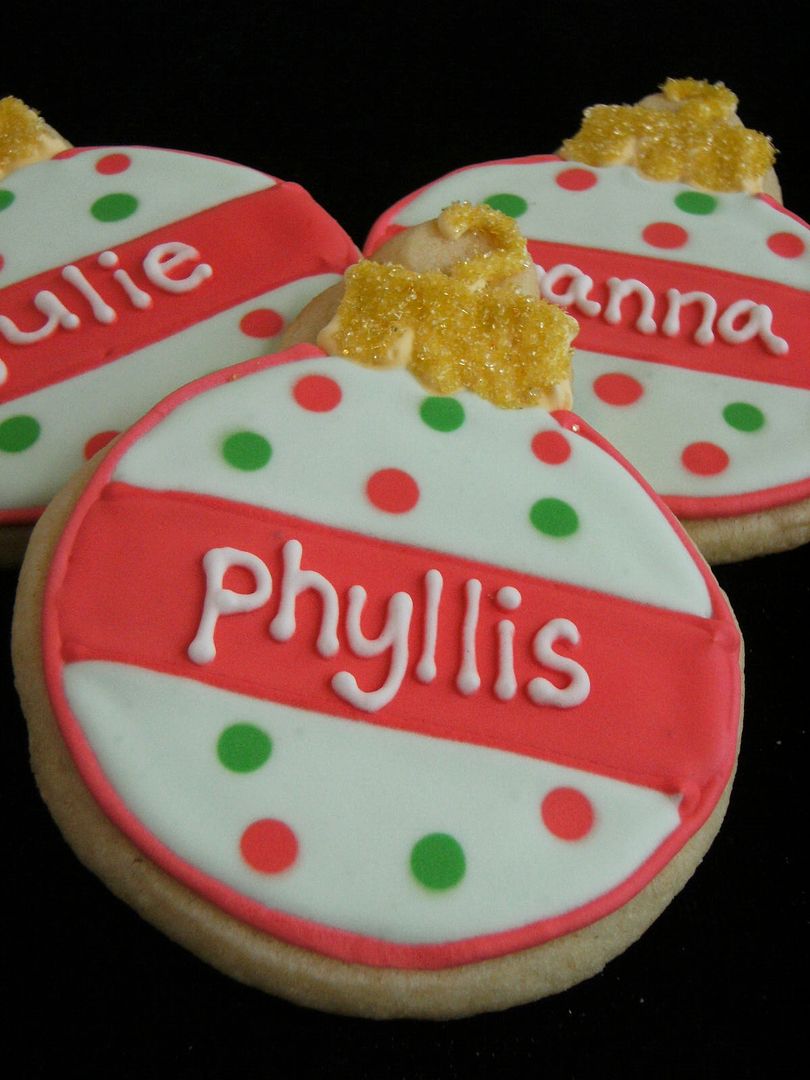
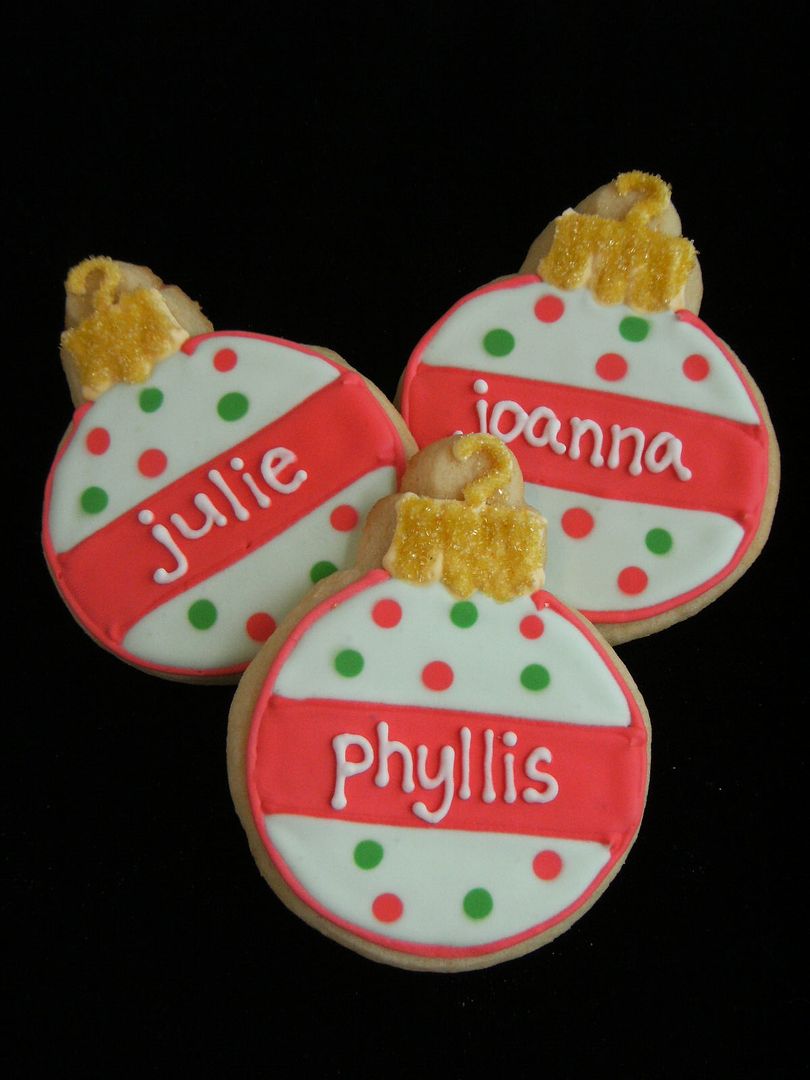
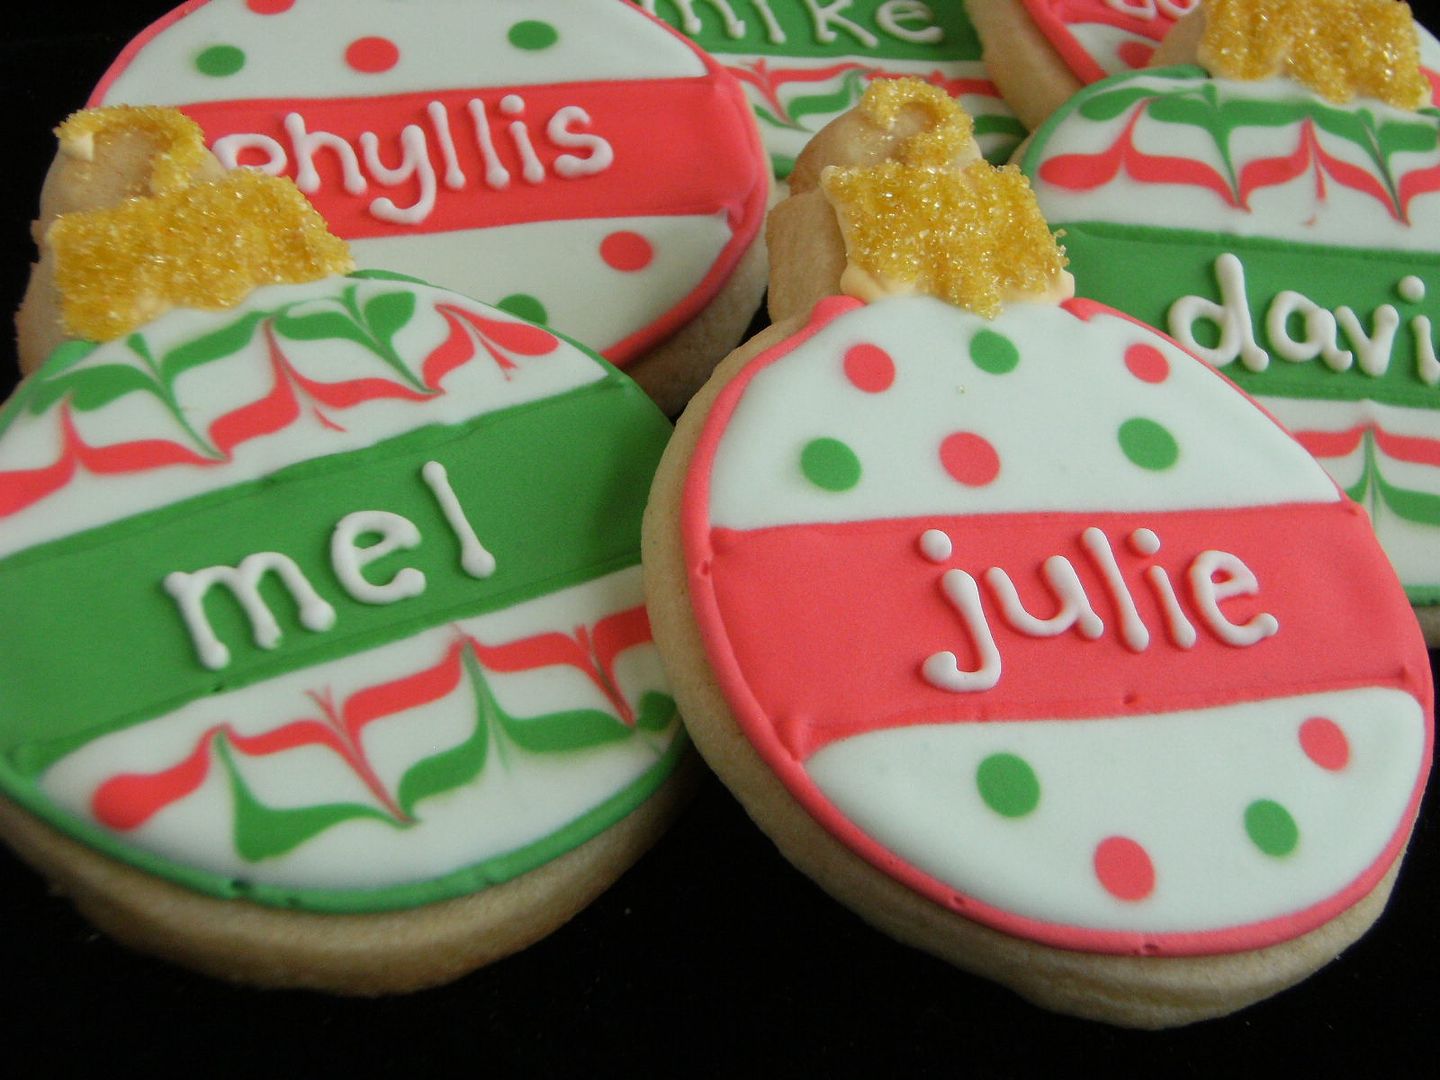
This one happens to be my favorite because Phyllis is my favorite character on The Young & The Restless. (Is that more than you wanted to know about me?)
To make them:
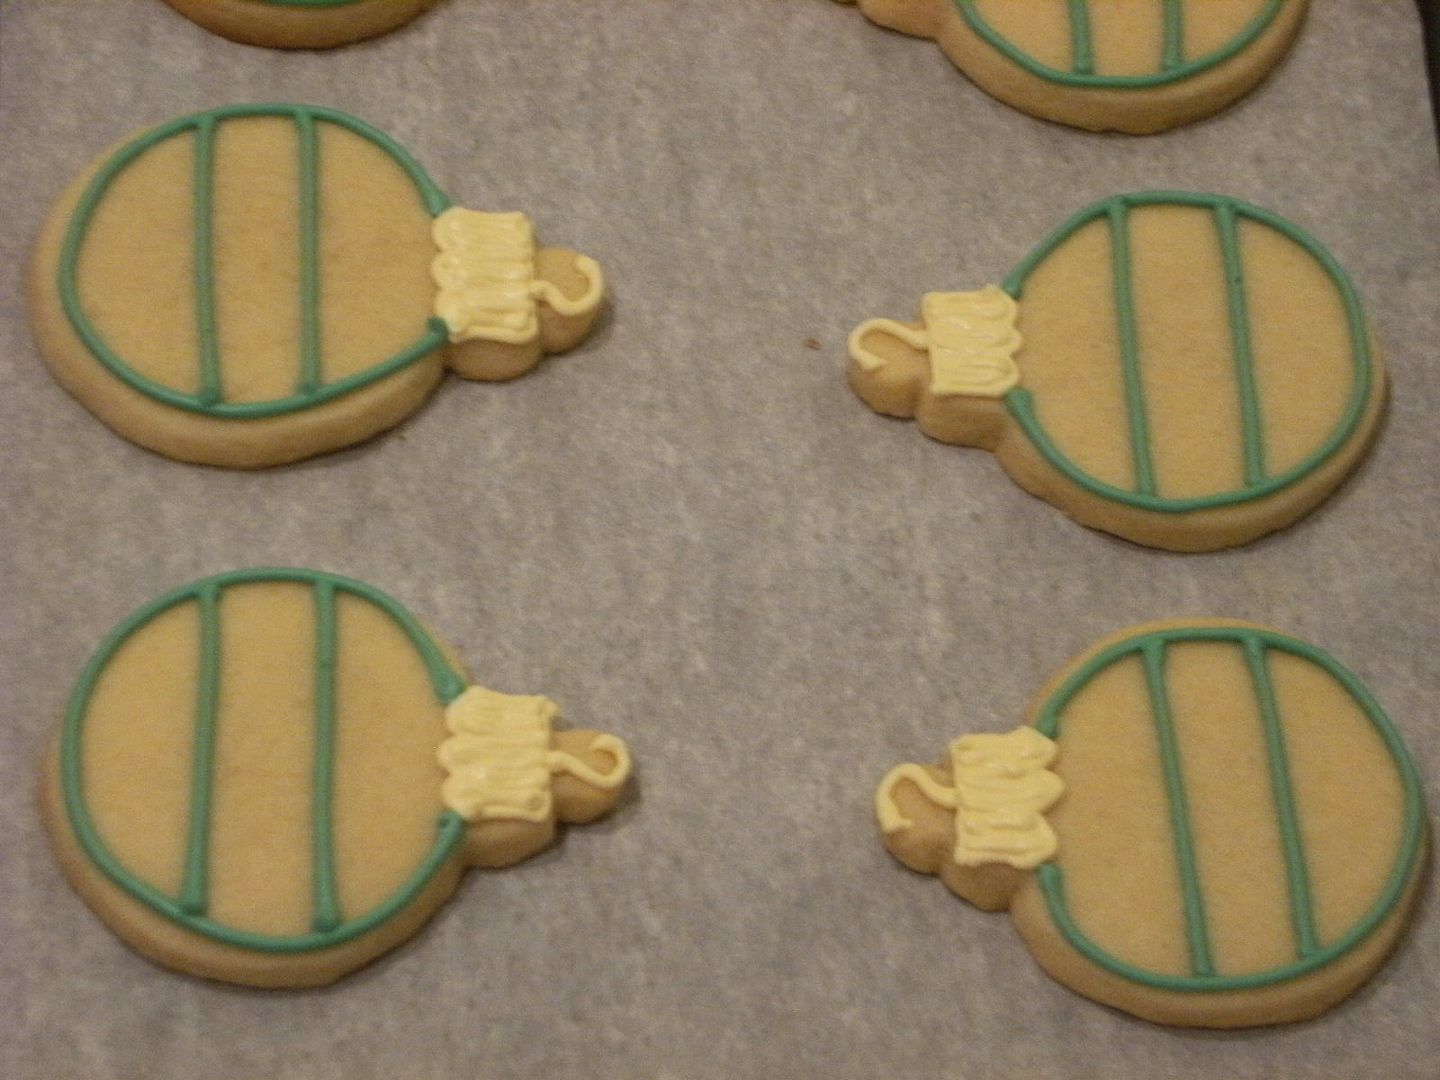
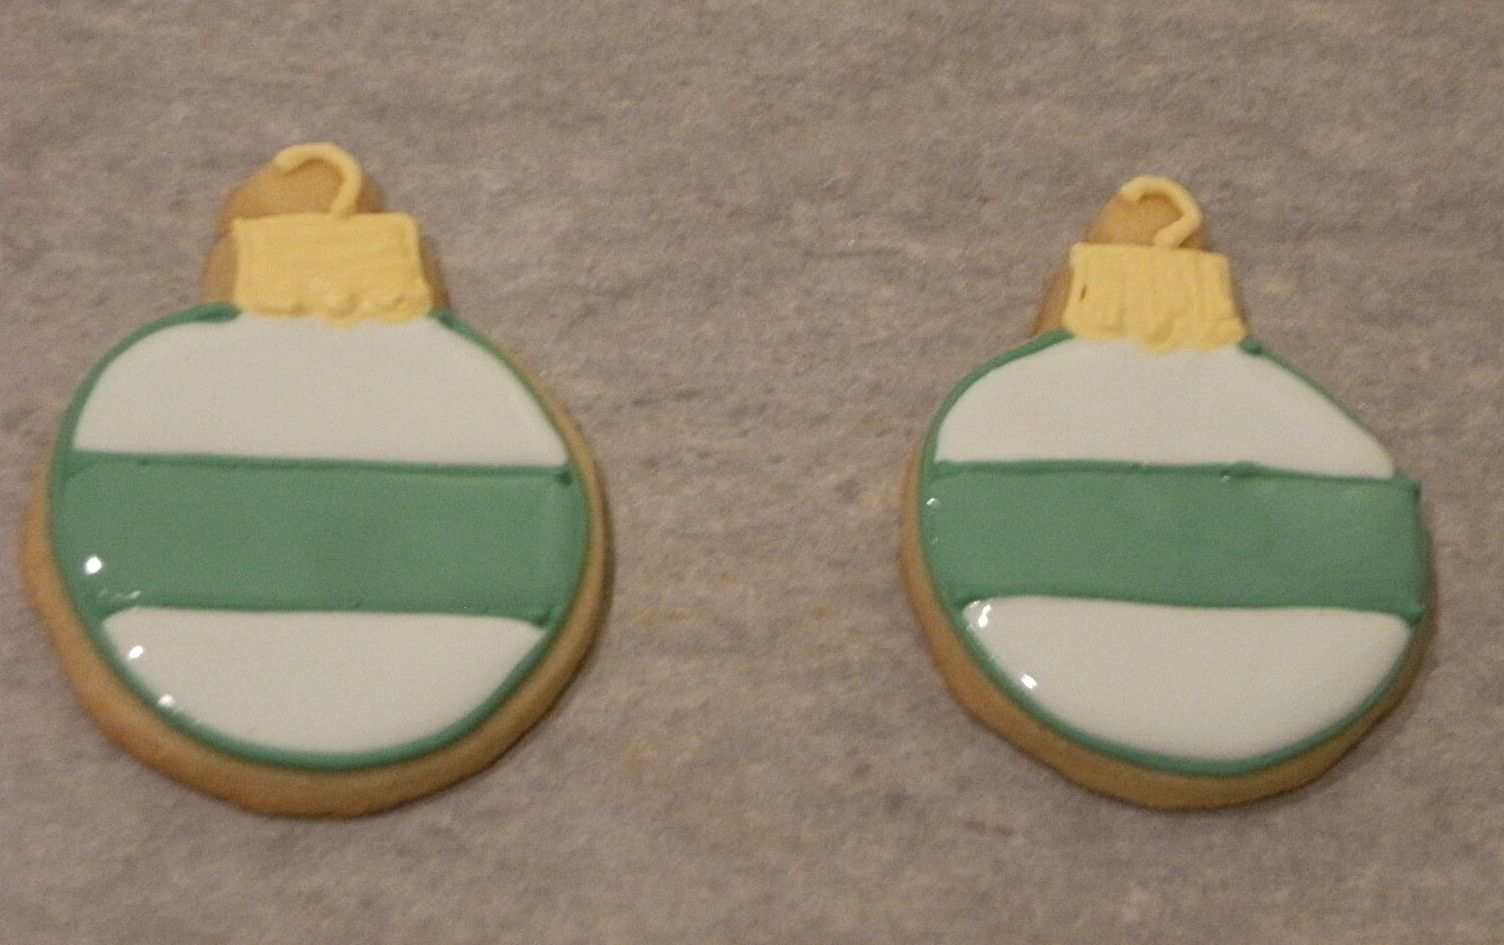
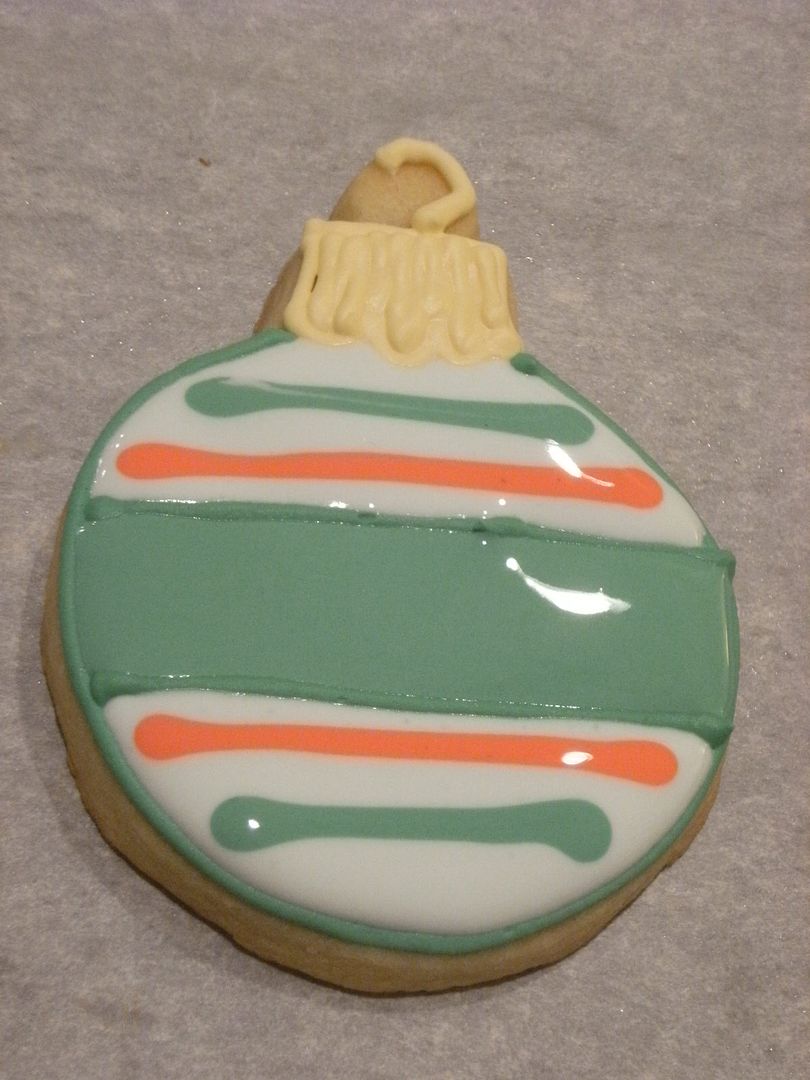
- With gold icing and a #2 tip, make the hanger and top of the ornament. (AmeriColor Gold mixed with Egg Yellow)
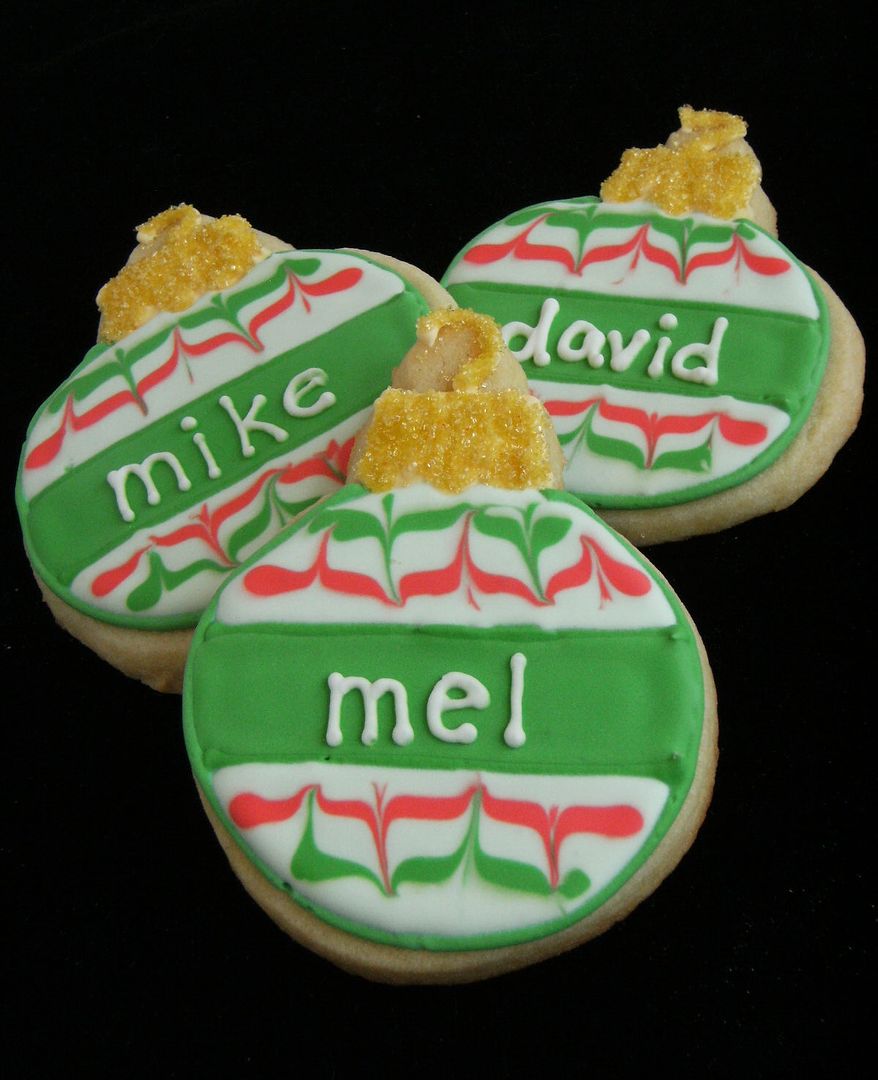
- With a #2 or #3 tip, pipe the outline of the ornament and two lines across the center. (AmeriColor Leaf Green)
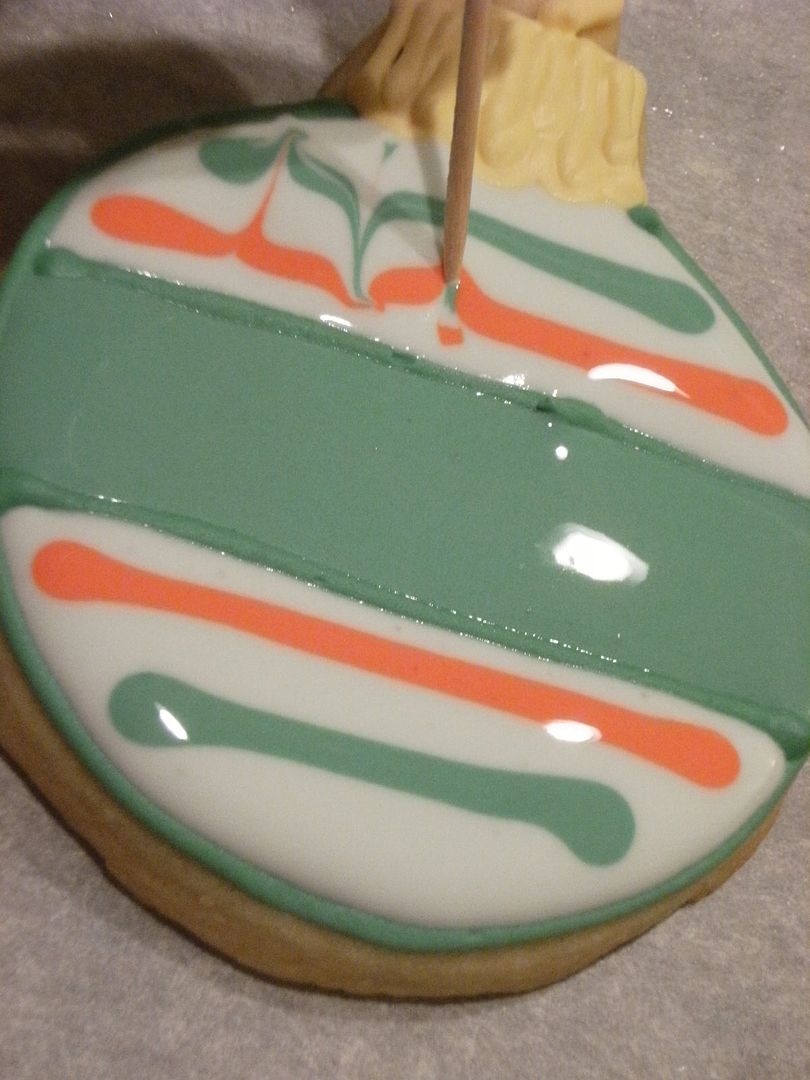
- Thin green, mint and red icings with water (by hand) to the consistency of syrup. Cover with a damp dishtowel and let sit several minutes.
- Stir gently with a rubber spatula and transfer to squeeze bottles.
- Fill in the center section with green icing.
- Fill in the top and bottom areas in mint icing, work about 6-8 cookies at a time. (AmeriColor Leaf Green)
- Go back over the 6-8 cookies, adding a line of green and red (AmeriColor Super Red) thinned icing right on top of the wet mint icing.
- Drag a toothpick up and down the icing, through the stripes creating a zig-zag look.
- Let the cookies dry at least 1 hour.
- With a #1 tip, add the names in white royal icing.
- Let dry overnight.
{Remember the colors will darken up and these were taken at night. It kills me a little inside every time I post these dark pictures!}
This is how I set up my sparkling sugar station....
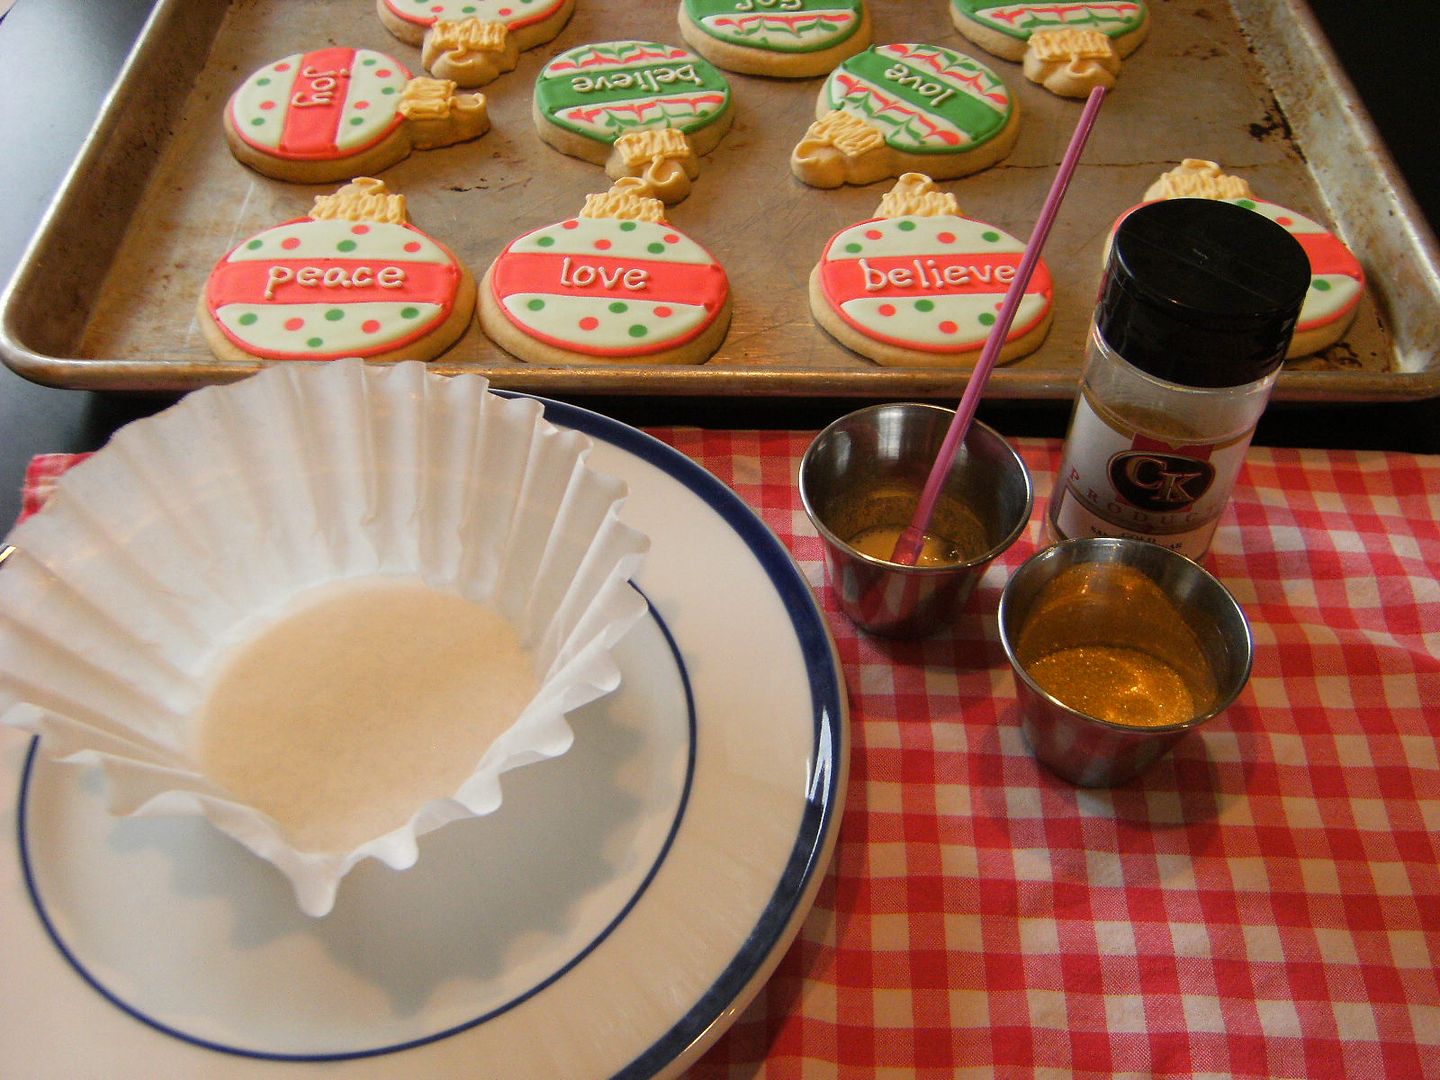
- coffee filter for catching extra sprinkles,
- mixture of meringue powder and water,
- small container for the sanding sugar,
- child's paintbrush,
- paper towel (or dish towel)
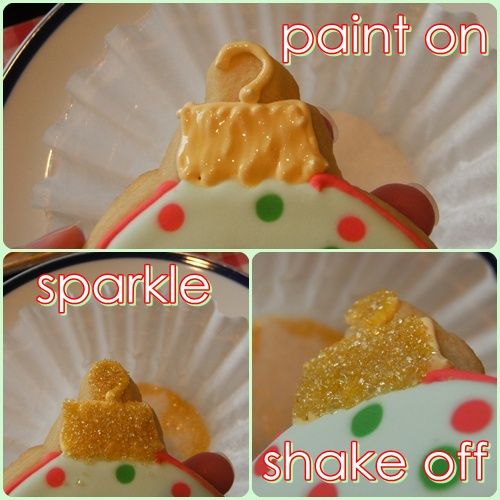
Paint the meringue powder and water mixture where you'd like the sparkles. Shake on the sparkling/sanding sugar. Shake off the excess onto the coffee filter.
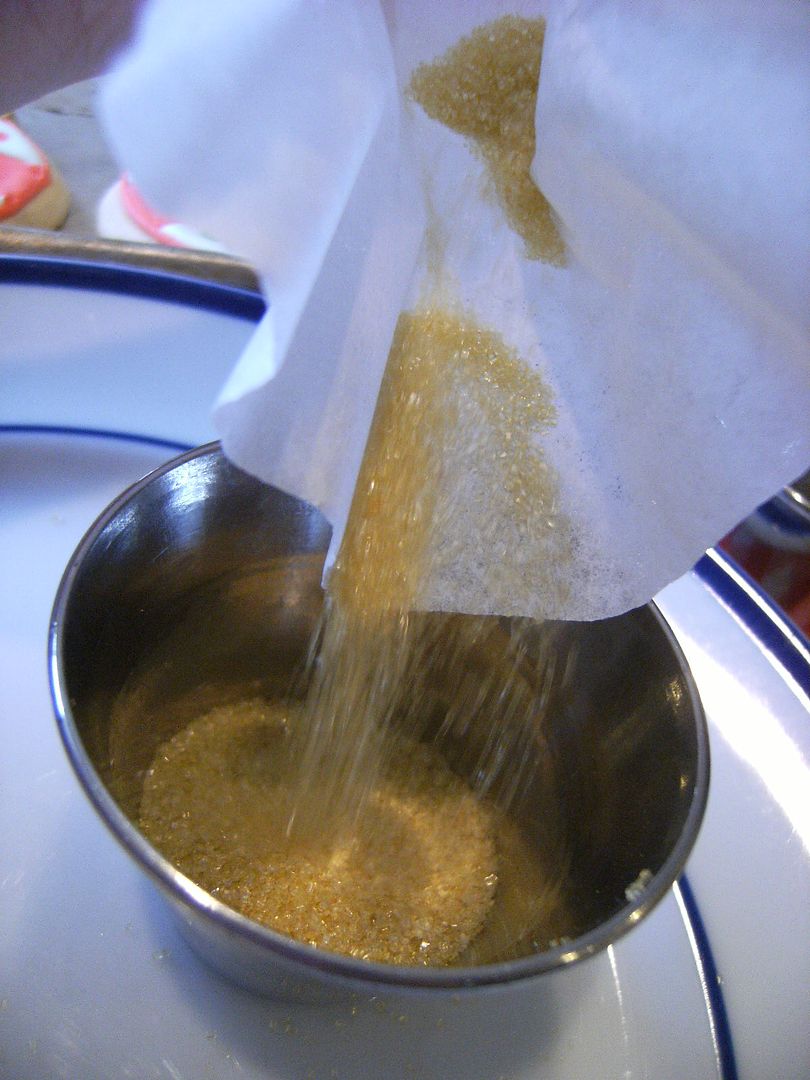
Use the coffee filter as a funnel to use again.

OK...I'll see you guys tomorrow with the marriage proposal cookies!!! In the meantime, here's a link to blue and red ornament cookies from last year. Happy baking!
No comments:
Post a Comment